Guide
1 Introduction
AnnoVid is a web browser extension allowing you to annotate your videos and share with your friends and colleagues. You can annotate videos on all video platforms and web pages – not only YouTube or a few others. For example, if you are a company and you would like to share videos with colleagues over the company’s intranet, you can use AnnoVid.
Here are some typical use cases for using AnnoVid:
- The creator of a YouTube video asks a certain group of people to review their video before making it public. The reviewers can use AnnoVid to make annotations to the video and send it back to the video originator.
- A teacher publishes an online video course for their students via the school's intranet. The students can comment on the video or post questions by adding annotations.
- Design videos of new product ideas within a car company are shared among colleagues. Reviewers can use AnnoVid to comment on the design videos.
- A person uses online videos to study a topic such as learning a new language via online videos. They can make additional notes for private use by adding annotations.
You can receive the extension from your favorite’s browser extension store and use it right away.
In this document, the functions of AnnoVid are explained.
2 Requirements
All video platforms and web pages are supported by AnnoVid that make use of HTML5 video elements. Flash videos are not supported.
The extension is available for Mozilla Firefox for Desktop and Google Chrome for Desktop browsers.
3 Installation
First, you need to install AnnoVid from your browser’s addon store. Afterwards, open the sidebar of your browser and select AnnoVid.
4 Video list
The following screenshot shows the view of AnnoVid after installation.
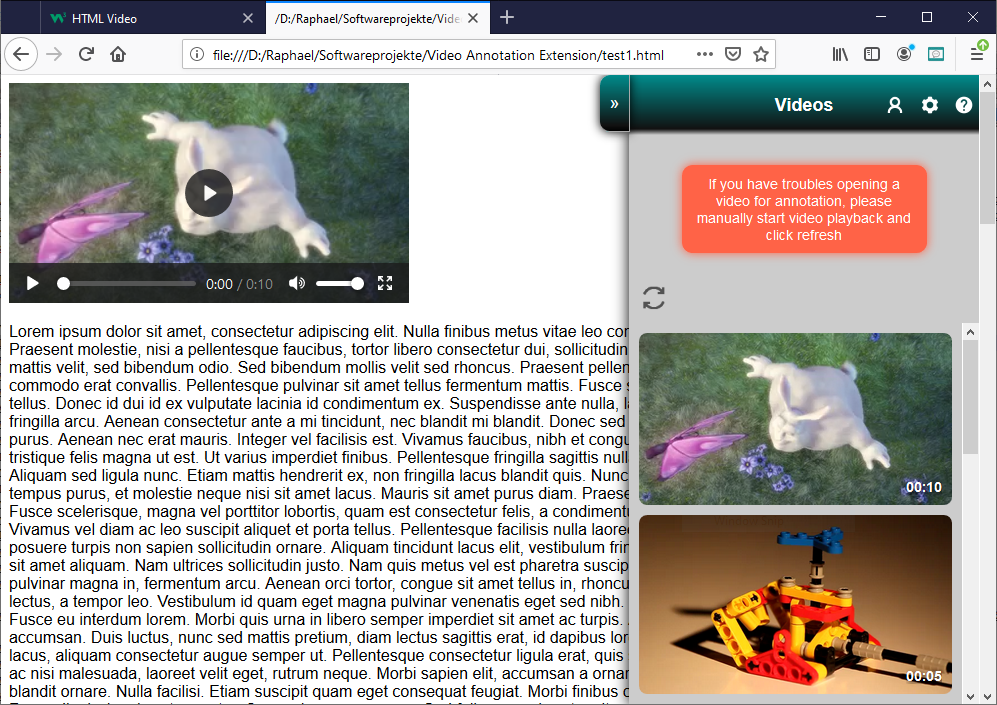
Just hit some web page address into the address bar of your browser and click the AnnoVid button ![]() next to the address bar. The extension searches for video elements within the loaded web page and lists them all. If no videos are listed, you can click the refresh button to try again. If only one video has been found, the extension directly forwards to the annotation list of that video.
next to the address bar. The extension searches for video elements within the loaded web page and lists them all. If no videos are listed, you can click the refresh button to try again. If only one video has been found, the extension directly forwards to the annotation list of that video.
5 Annotation list
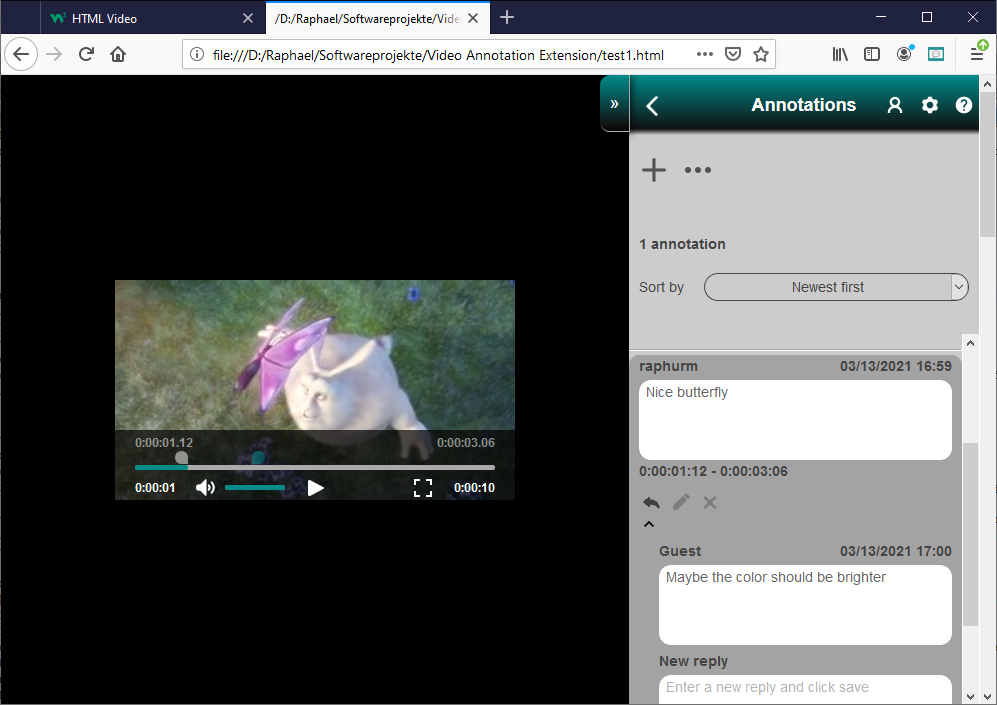
To start annotating a video, click on one video in the video list. Then, the view of AnnoVid changes to the list of annotations for this video. Furthermore, the video element from the web page is presented as overlay over the page.
5.1 Using the video player
The video player consists of common control elements common (a play/pause button, a full screen button, a slider for controlling the volume and a slider for controlling the video playback position). The control elements become visible as soon as you hover your mouse over the video.
It furthermore consists of a range control. This allows you to mark the start and end playback position of your annotation. The range control is displayed if you click on an annotation in the annotation list or if you are editing an annotation.

5.2 Controlling the range control
The range control consists of draggable slider thumbs (the left thumb is white while the right one is blue) and the time codes for both thumbs. The range thumbs can be moved like in any other slider. Additionally, they can be controlled in small steps as shown in the following screenshot.

If you hover with your mouse over the left or right time code, two arrows appear. By single-clicking on one of the two arrows, the range thumb position increases or decreases by one video frame. If double-clicking on that arrow, the range thumb position increases or decreases by one second (which equals 25 video frames for most video formats).
Be aware that the left range thumb will always be to the left of the right thumb, i.e. it can never jump over it!
5.3 Managing annotations
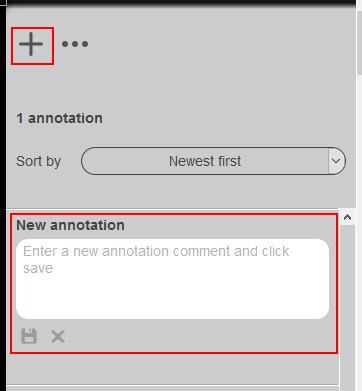
You can add a new annotation by entering a comment into the top-most text area of the annotation list (the text area labeled as New annotation) as shown on the illustration above. Alternatively, you can click on the + button at the top of the annotation list which directs you to the mentioned text area. After you entered some text, just click the save button and your comment is added to the list with your user name, the current time stamp and the current range positions of your video player.
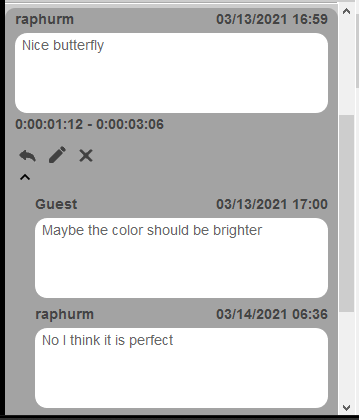
Each annotation in the list shows the user name of the author, the creation time, the annotation text and the start and end playback position.
Later, when you have some annotations in the list, just click on one annotation and the video player shows the corresponding playback position.
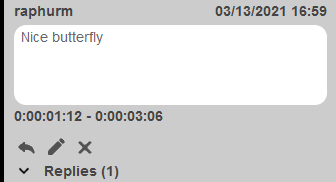
Below the annotation, there are three buttons (from left to right):
- Reply: When clicking on that button, the reply list of the selected annotation expands and it directs you to the text area for entering a new reply comment (as shown in below illustration).
- Edit: When hitting this button, you can edit the annotation. Instead of the three buttons below the annotation, there are two other buttons: The left one for saving the changes and the right one for cancelling the changes. In edit mode, you can change the annotation text and select new range positions within the video player. When saving the changes, the new annotation text and the new video range positions are saved. Be aware that you can only edit those annotations that you originally created. You cannot edit annotations of colleagues or friends.
- Remove: Remove the selected annotation. Be aware that you can only remove those annotations that you originally created. You cannot remove annotations of colleagues or friends.
Once you added an annotation, you or your colleagues can later add replies (how to share annotations with your friends and colleagues is explained at a later section). This can be done by clicking the reply button, entering a reply text and saving (as illustrated below).
5.4 Share, export and backup
By the clicking on the ... button, the following methods are available:
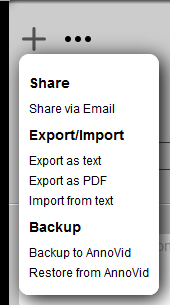
- Share via email
- Export as text
- Export as PDF
- Import from text
- Backup to AnnoVid
- Restore from AnnoVid
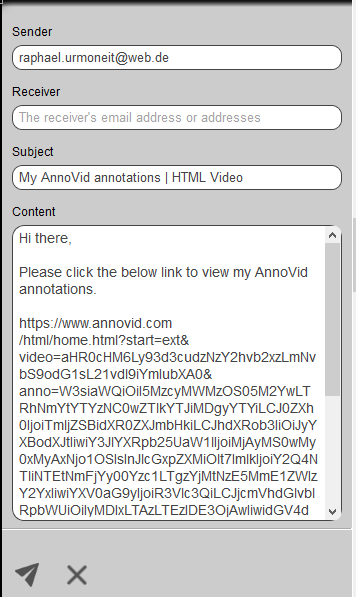
When you choose the option Share via email, an email form opens where you can enter the receiver addresses. By clicking the send button, all annotations of the current video are packed into a link. If you are logged in, your email address will be set as sender address. Otherwise, you have to specify the sender address manually. The subject and body are pre-filled. The body contains the link that the receivers can open with their web browser. The link points to the AnnoVid server and contains all annotation data of the current video in an encoded form. If the receivers open the link, the following happens:
- If the receivers do not have the AnnoVid extension installed, the link opens the home page of AnnoVid.
- Otherwise, the link forwards to the same page as you shared the email from.
- As soon as the receivers open the extension sidebar on that page, they are asked whether they want to insert the annotations contained in the link.
The option Export as text lets you save the annotations of the current video as text file in JSON format. This method can be used to backup your annotations or to share your annotations with your friends and colleagues. Via the option Import from text, the annotations can be imported from a file from your hard drive.
If you want to export the annotations as PDF file, just hit the Export as PDF option. For each annotation, a video snapshot of the annotation's start position and the annotation's replies are included.
If you are logged in, you can backup your annotations to AnnoVid and restore them when needed.
6 User area

Creating an account with AnnoVid is free of charge. If you register, you may use some functions that are accessible to registered users only. These include:
- Annotations created by you are connected with your account, i.e. the annotation's author will be your account. If you are not logged in, annotations created by you will be connected with the default guest account.
- You can backup and restore your annotations with AnnoVid.
At the user area, you can login to your AnnoVid account, view your user profile, logout or create a new account.
7 Settings

Below screenshot shows the settings for AnnoVid.
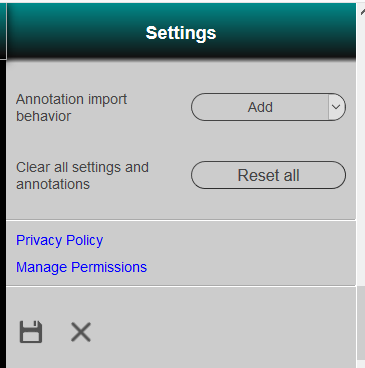
You can choose from one of two annotation import behaviors:
- Add: When importing new annotations, they are added to the existing annotations for the selected video. This behavior also takes care of removing duplicate annotations and replies. For example, if after sharing the annotations between team members multiple times, there might be the same annotation in two export files but the import mechanism will not add the duplicate annotation twice to the annotation list.
- Overwrite: When importing new annotations, they replace the existing annotations for the selected video, i.e. the existing annotations are removed prior to adding the new annotations to the list.
By clicking the reset button, all annotations of all videos are cleared and the annotation import behavior is reset.
The Manage Permissions link opens a page in a new tab. On that page, you can grant permission to AnnoVid to access video elements within embedded frames. You can grant and revoke the permission any time.